

Some scrapbook embellishments can use a little extra something to make them truly special; maybe a few rhinestones or some metallic paint. In this example, I added crystal glitter to the flowers of a dimensional sticker to give it more beauty and sparkle.

The sticker I used came from a collection of Grand Adhesions Dimensional Stickers (BW Flora & Fauna, Birds and Leaves) designed by Brenda Walton for K&Company. I also used a sheet of pink paper from K&Company's Julianne Solid Mat Pad.
I chose the Elegant Oval Paperweight Kit for this project because I thought it would frame everything beautifully. (PhotoWeights: Elegant Oval)

The first step in creating a paperweight that features an embellishment, memento, or other curiosity is to construct a background on which to place it. This is done by covering the self-adhesive mounting board (included with each PhotoWeights paperweight kit) with a piece of decorative paper. You can use a variety of other materials, too. Just be sure the item you're displaying can be adhered to it properly.

Using a pair of scissors, I cut the paper that extended beyond the edge of the board. The edge of the board will act as an excellent cutting guide.

After the sticker was applied to the center of the mounting board, I went over it with an embossing tool and gently pressed down to make sure the adhesive came into contact with the background paper. It's especially important to press down the edges and any small parts of the sticker such as the delicate leaves shown above. If you don't have an embossing tool, something similar with a smooth point will also work.

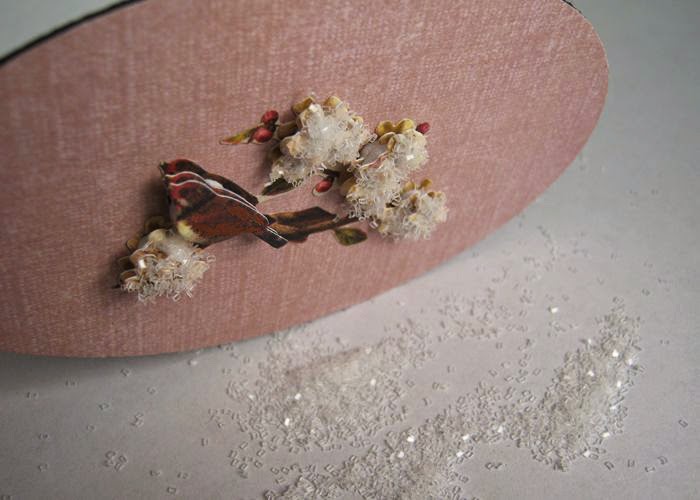
After the sticker was securely in place, I applied white glue to the flowers and used my embossing tool to spread the glue evenly.

A generous amount of crystal glitter was sprinkled onto the glue. (I placed a sheet of paper underneath the mounting board to catch the loose particles.)
I gently knocked the edge of the mounting board onto my work surface to free any loose particles.

After the glue was completely dry, I used a soft paint brush to remove any remaining pieces of loose glitter. I was left with the finished design pictured above.
When you're working with glitter, it's important to remove any loose particles to prevent them from floating within the interior of your paperweight.

The mounting board was placed face-down into the recessed area on the bottom of the paperweight.

To finish, I applied the self-adhesive pad (included with each PhotoWeights paperweight kit) over the bottom surface of the paperweight.

You're left with a beautiful paperweight design that will last for years to come.


0 comments:
Post a Comment
Please join in the conversation! We'd love to hear from you!