12/29/2014

Personalizing Paperweights With Names, Monograms, and Text


Many of our customers have asked for a little guidance when it comes to personalizing paperweights with a name, monogram, or other text.  These basic, step-by-step instructions are an excellent starting point.  They can be also be modified in several different ways.


In most cases, the first step in designing a paperweight with text is to create a layout using a desktop publishing program.  If you don't have publishing software, a word processor or image editor with text capabilities can also be used.

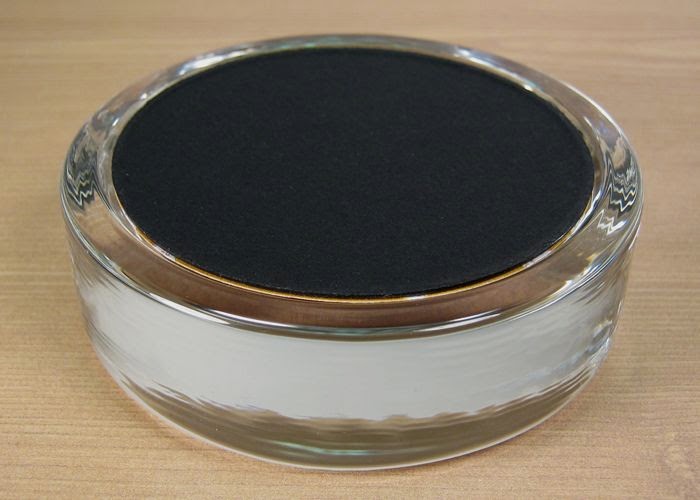
Our website includes the display area measurement for each of our paperweight kits.  Using a shape or drawing tool with your ruler visible, draw a shape (circle, oval, rectangle, etc.) that is the same size as the paperweight's display area.  For this project I'm using the Elegant Oval Paperweight Kit (PhotoWeights: Elegant Oval)  which includes a smaller display area in the center.  I've drawn two oval shapes.  The outside oval is the size of the mounting board.  The inside oval marks the actual display area.

I'm going to print my name onto decorative paper, so the name is all I'll print.  If you wish, you can place a background image or solid color behind your text so it prints as ready-to-use artwork.

I deleted both outlines prior to printing the name because I'm going to position a template over my artwork to create a cut line.


I printed a test copy so I could check to make sure the name fits well within the paperweight.


Because I'm printing the name onto uncoated, textured scrapbooking paper, I need to print this using my ink jet printer.  Toner doesn't adhere well to textured paper.  Many decorative papers have coatings that can damage laser printers.  If you're using a laser printer, use only laser-safe paper.

I taped a piece of scrapbook paper to a sheet of letter sized paper because my printer has a difficult time recognizing odd sized pages.  I recommend leaving 1-2" of space at the top of the page to allow room for the tape.  This will also help the page feed properly into your printer.

Be certain there are no adhesive areas of tape exposed, including pieces that may have gone beyond an edge of the paper.  You don't want any tape to catch inside your printer.

All printers are different.  Consult your user's guide.


The name was printed using an "automatic" paper setting on the highest quality setting possible.

I used a template (PhotoWeights: Display Area Templates) to draw a pencil line that will act as my cutting guide.


The name was cut out with a pair of scissors.  If any traces of the pencil line will appear in your paperweight, gently remove them with an eraser.


Place the printed paper onto the adhesive side of your mounting board and press all over to ensure an even bond.


Place the board face-down into the recessed area on the bottom of your paperweight.  Be sure to clean the paperweight with glass cleaner prior to completing this step.  Also be sure the bottom surface of the glass if free of smudges and dust particles.


Finish by applying the self-adhesive bottom pad to the underside of the paperweight.


This step-by-step guide can also be used to create monogram paperweights and paperweights with poetry, quotes, and other text.

If you have any questions, or if you need help with your particular paperweight project, please feel free to contact me directly at susan@photoweights.com.

9/11/2014

A Vignette of Antique Sewing Notions Displayed in a Glass Paperweight


My blog post from yesterday (Glass Paperweight Finished with a Vintage Thread Card) walked you through the steps involved in placing a single object in a paperweight using a decorative paper background.  Today's project will show you how to display a few different items in your paperweight.  There are more steps involved.  However, I'm sure you'll find each step is just as easy, depending on the complexity of your design layout.


For this project I used the Large Rectangle Paperweight Kit (available on our website at PhotoWeights.com).  This paperweight style features the largest display area we offer (4 1/2" x 2 3/4").  My display items include a page of scrapbook paper (to use as the background), a paper card of sewing snaps, and a thread card.


Because I want the background to blend in, I chose a piece of scrapbook paper that coordinates with the display items I'm using.  The paper has an aged look that I love.

The self-adhesive mounting board (included with each paperweight kit) is adhered to the reverse side of the paper.  Using a pair of scissors, trim any paper that extends beyond the edge of the board.


I applied glue to the back of the paper sewing card, making sure to keep the glue away from the edges.  You can use white glue for this step, or any liquid glue that's suitable for paper.   (I used Aleene's Original Tacky Glue.)

If you're using items that have sentimental value, such as notions from your grandmother's sewing box, consider using removable, double-sided mounting tape or non-permanent glue.  If you glue something in place permanently, it may be ruined if you decide to remove it from the paperweight at a later time.


The card (with glue on the back) was centered onto the mounting board and carefully pressed into place.  Notice I kept the handwritten, 10-cent price on the card.  I thought this added some character to the piece.


Glue was also applied to the back of the paper thread card.  Again, I kept the glue away from the edges.  I also made sure the tail end of the thread was covered with glue so it would stay in place.


The thread card (with glue on the back) was placed directly onto the card of sewing snaps.


After the thread card was in place, I thought the design needed a little something extra.  I found an old, metal tool in my box of sewing items that I thought would be perfect.  This was glued to the top of the thread card and positioned at an angle.

Once all the elements of your design are finished, allow the glue to dry completely to keep everything in place.  Some types of glue release chemicals during the drying process.  If your glue isn't completely dry before you assemble your paperweight, you may end up with a cloudy film inside the glass. 


After the glue has dried completely, place your design face down into the recessed area on the bottom of the paperweight.


Apply the self-adhesive bottom pad (also included with each paperweight kit) over the base of the paperweight.


You're finished!
Posted on Thursday, September 11, 2014 | Categories:

9/10/2014

Glass Paperweight Finished with a Vintage Thread Card


Last month I purchased a small assortment of vintage thread cards at an antique shop that recently opened a few towns away.  I thought I'd use one in a project to show you just how easy it is to design and create paperweights that display a single object.

These instructions may be followed if your working with other types of objects.  Just be sure the items aren't too thick to fit into the bottom recess measurement of your paperweight kit.


I used the Round Paperweight Kit for this project (available at PhotoWeights.com) because I thought it was just the right shape for displaying a round thread card.  For the background, I chose decorative grid paper because it reminded me of the old cutting board my mom used for her sewing patterns.


After I placed the self-adhesive mounting board (included with each paperweight kit) onto the back of the grid paper, I used a pair of scissors to trim any paper that extended beyond the edge of the board.


The thread card was glued directly to the mounting board, making sure the tail end of the thread was tucked underneath and held in place by the glue.

If you're working with an item that has some value, including sentimental value, you may want to take better care when it comes to affixing it to the mounting board.  If you don't want an item to be ruined if you ever decide to remove it from the paperweight, consider the use of non-permanent glue or mounting tape.  Some items may also be held to the card with wire that passes through holes punched through the mounting board.


To add a little extra touch to the design, I placed a needle through the thread.


After the glue has dried completely, place your design face down into the recessed area on the bottom of the paperweight.

Some types of glue release chemicals during the drying process.  If your glue isn't completely dry before you assemble your paperweight, you may end up with a cloudy film inside the glass.


Apply the self-adhesive bottom pad (also included with each paperweight kit) over the base of the paperweight.


You're finished!

8/14/2014

A Guide to Selling Crafts for the Holidays


With August nearly half-way through, it’s time to start planning for the holiday season.  I know it seems a little soon.  Believe me, though, getting ready for the most critical season of the year takes time.

I wanted to put together a simple guide that will help you prepare and plan your holiday strategy.


Branding

There are three things you need to know about creating a brand for your business that will make you stand out:

  1. Business is all about relationships.
  2. Three seconds are all you have.
  3. Perception and perceived value is everything.
Ask yourself these questions:

  • What makes your business unique?
  • What niche is available that only you can fill?
  • What attribute do you have that best fits your clients’ expectations?
Putting the answers to these questions together in one sentence will help you know your brand and develop a successful branding statement.

Visual Design and Marketing

Visual design is a critical part of brand identity.  It all starts with a great logo.

If you don’t have a logo, and you’re not able to design one yourself, many graphic designers offer these services online at a reasonable price.   I would recommend searching the marketplace sites at Etsy.com and Artfire.com.

The fonts, colors, and layout of your logo, business cards, postcards, and other marketing materials should evoke your brand.  Use the same color scheme and fonts so your identity remains consistent.  Your brand image (user icons, banners, and backgrounds) should also be consistent across your social media sites.

Pricing Your Goods

Most handcrafters start their own business because they love to design and create.  Even if your main motivation isn’t raking in large profits, you need to make some profit to re-invest into your business to make it flourish.

When you price an item, you should always figure in the cost of your materials and the time you have invested in each piece.  Make sure your profit makes it worthwhile.

It’s important to offer items in a variety of price ranges. While many shoppers are looking for gifts priced at $50.00 or more, even more are looking for more affordable items for less than $25.00.

Selling Online

If you’re planning to bring in online sales this holiday season, but you haven’t opened a website yet, it’s time to get started!

The fastest way to start selling your handcrafted goods is to open a shop within an existing, online marketplace such as Etsy.com or Artfire.com.   Marketplaces inspire buyer confidence and drive traffic. They also require hardly any investment to get started.

Setting up an Etsy shop doesn’t take very long.  The most time-consuming part is writing copy (information about your store, your store policies, and a background piece about yourself).  You also need to create a banner (artwork) for the top of your Etsy shop.  This can simply be the name of your store or a logo.  (You can pretty it up later).

Etsy offers a great deal of online help to make the process of designing your shop much easier.  Each year Etsy also offers a free Holiday Bootcamp that covers everything you need to know about preparing your Etsy store for the holidays, including tips on taking beautiful photos.

Sell at Craft Shows and Holiday Fairs

Selling your goods in person is the perfect opportunity to meet customers and get their feedback about your products.  It’s also a chance for you to network and get some marketing exposure and leads on wholesale orders.

While you’re selling at a craft show, make the most of your time.  Bring business cards, promotional items, talk to other vendors, and look at other displays for inspiration.

To find craft shows in your area, go to festivalnet.com or do an internet search.  Craft shows can fill up quickly, so you should register early.

Sell to Local Gift Shops and Boutiques

Selling wholesale to retailers isn’t for everyone because you can only expect to receive half your retail price.  Wholesale may be a good avenue if you’re looking for ongoing sales, as well as the prestige of selling your goods in a popular shop.

Before you approach retailers, be sure they offer items similar to yours that would appeal to the same demographic.

Payment Services

Whether you’re selling online or in person, you should expect your customers to want to pay with a credit card.  That’s why this topic is so important.

You don't need a formal merchant account to accept credit cards these days.  Paypal is an online payment service that’s widely used by buyers and sellers alike.  If you have an Etsy shop, you can also sign up for Etsy’s Direct Checkout which will allow buyers to pay by credit card, debit/bank card, and Etsy Gift Cards.

There are a variety of companies that offer mobile payments using a card reader that connects to your smart phone.  These are essential for craft fairs and other venues where you sell in person.  A few mobile payment services are Paypal Here, Square, and Amazon Local Register. 

Getting the Word Out

Whether you sell online or at craft shows, it’s important to share photographs of your products on Facebook, Twitter, Pinterest, Instagram, and other social media sites you actively use.  This will allow your fans to share your photos and offer their reviews so you can increase the reach of your message.

If you’re selling at an upcoming craft show, share this information with your followers and post pictures of your finished booth.  If your customers can't come to you, you have to bring your products to them through your photos and videos.


If you have any questions about selling your handcrafted items, feel free to post a comment.  I'm more than happy to be of help.


8/07/2014

Six Easy Steps to Pressing Flowers Between the Pages of a Book


Last month I began a blog series on drying and pressing flowers for use in your paperweight designs and other craft projects.  Now that I've covered drying flowers with silica gel (Six Easy Steps to Creating Beautiful, Dried Flowers) it's time to move on to pressing flowers.

There are many different kinds of flower presses on the market that you can use.  My press of choice is a big, heavy book.  Practically everyone owns one.  If you're among the few who don't, you should be able to find one at a local thrift store for a dollar or two.

Here's what you'll need:

     Gift tissue (preferably white or kraft)
     Large "coffee table" book
     Thick, heavy book
     A few sheets of regular printer paper
     Waxed paper
     Patience


Step One:  Arrange the flowers and leaves you'd like to press on a few sheets of gift tissue (preferably white or kraft).  They should be spaced apart and cover an area no larger than the "coffee table" book you'll be using.


Step 2:  Cover the flowers with two more sheets of gift tissue.


Step 3:  Gently place your "coffee table" book over the flowers and allow the book to settle as much as possible.  Don't apply force because this may crush and damage the flowers and leaves.

Leave the book in place for at least a day.


When you remove the book, the flowers will be partially dried and free of surface moisture.


Step 4:  Fold a piece of waxed paper and sheet of plain printer paper in half.  (The printer paper should be on the outside to protect the pages of the book from moisture).  Arrange flowers and leaves of similar thickness on the waxed paper, making sure to leave space between each clipping.


Step 5:  Fold the waxed paper and printer paper over to cover the flowers.


Step 6:  You can place more than one layer of dried flowers in the same book.  Just be sure there are 100 or so pages between your pressings.  Once the book is full, set it aside and place something heavy on top of it.  You can use another large book, a couple bricks from your garden, or whatever else you may have around your home.

This is where patience comes into play.  You should leave your pressings undisturbed for at least two weeks.


There you have it!  Six easy steps to pressing flowers.


Storage Tips:  After you've removed the pressed flowers from the waxed paper, place them on a flat tray or cookie sheet if you plan to use them soon.  For long-term storage, you can keep your pressings in shallow, air-tight containers or between sheets of printer paper within the pages of a book.


Pressed flowers from your garden or florist can be used to create stunning paperweights that will bring a colorful touch of nature to your desk.  We hope you'll visit our blog again soon as we show you how to capture pressed flowers in a variety of paperweight designs.


8/06/2014

A Victorian Inspired Paperweight Featuring Dried Baby's Breath and Statice


This paperweight was made using some of the small flowers I dried in my earlier blog post (Six Easy Steps to Creating Beautiful, Dried Flowers).


The supplies I used for this project are shown above.  They include tacky glue, foam mounting squares, a swatch of paper to use as the background, some dried flowers, and a brass heart finding.

Once again, I'm using the Heirloom Dome paperweight kit from our shop at PhotoWeights.com.  This is my favorite of the domes we carry because of the beaded design that frames the display area.


The paper I chose for the background came off an old scrapbook cover I purchased to salvage for my craft projects.  If you prefer, you can use decorative scrapbook paper.

TIP:  If you like to go to flea markets and antique shops as much as I do, look for items you can use as backgrounds in your designs such as album covers, tattered books, embossed document folders, and other things covered in leather, textured paper, and fabric.


Place the adhesive side of the mounting board (included with each paperweight kit) onto the reverse side of your background paper.


Using a pair of scissors, trim any paper that overlaps the edge of the mounting board.


Place a double-sided, foam mounting square in the center of the background.  (If you're using old paper, make sure the adhesive will bond to it properly.)  Leave the protective paper over the top surface of the mounting square to keep the adhesive clean.


Apply glue around the perimeter of the mounting square.   The width of your glue pattern will be determined by the length of the flowers' stems and the size of the decorative piece (brass heart) you place over the flowers.


Begin arranging your flowers around the mounting square, making sure each stem is placed directly in the glue.


Layer your flowers until you're happy with the pattern and coverage.  Make sure the flowers aren't thick enough to apply pressure to the back of the decorative piece (brass heart).

After the glue has dried completely, gently tap the edge of the mounting board onto your work surface to remove any loose particles from the flowers.  You can also use a few puffs of air from an air canister.


To finish your design, remove the protective paper covering the adhesive on the mounting square.  After you've cleaned the back of your decorative piece (brass heart) with rubbing alcohol or glass cleaner, gently position it onto the mounting square and press down to secure.


Center the finished design over the adhesive side of the bottom pad and gently press down to secure.


After you've cleaned your paperweight with glass cleaner, place the bottom pad face-down onto the base of the paperweight.


The brass heart I used for this paperweight has a fairly flat back which provided the perfect surface for an adhesive mounting square.  If you'd to use something that has a textured or curved back, such as a piece of costume jewelry, you could glue one or more small wood or plastic cubes to the back to act as risers which would allow you to secure the item to the background while providing enough space to tuck the flowers underneath.