7/21/2011

Paperweight Featuring a Collage of Antique Sewing Needles


This paperweight features a collage of antique sewing needles and a beautiful, Victorian button set on a background created with the remains of an old needle book from England.

Working with paperweights is a little like working with shadowboxes... only in miniature.  You just need to use lightweight items that will fit within the dimensions of the paperweight's interior space (especially the depth).


For this project I'm using the remains of an old needle book for the background.  The flap of the needle book is made of textured paper with gold embossing that lends a rich look.  I'm also adding a paper package of needles, a metal needle box, and a faceted button with beautiful sparkle.


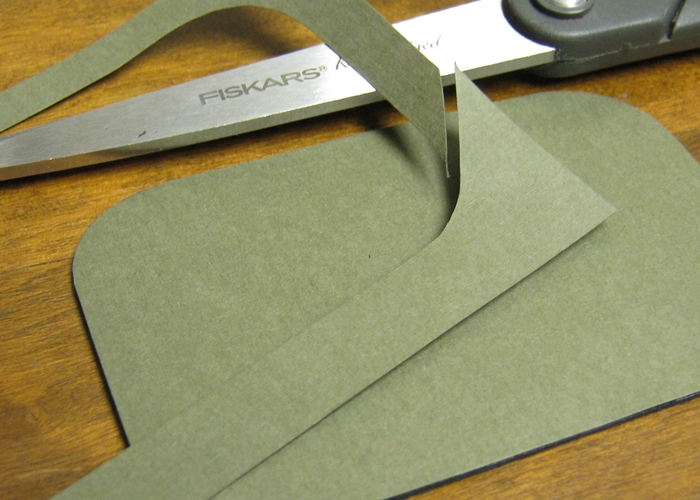
In order to create a base to build the design off of, I applied a scrap of green paper to the paperweight's mounting board and trimmed the overlapping material.


The old needle book was glued directly to the paper-covered mounting board with Aleene's Tacky Glue.  The fabric and paper that went beyond the edge of the mounting board was trimmed and the extra fabric was used to cover the exposed areas of green paper along the left and right edges.


Prior to adhering the button and needle holders to the background, I experimented with a few layouts before selecting the one above.  Each piece was put in place with Aleene's Tacky Glue.  I also used a glue dot to secure the flap of the paper package of needles.

After the glue dried completely, the design was placed face-down onto the recessed bottom of the paperweight (PhotoWeights: Heirloom Rectangle).  The paperweight was finished by applying the velvet bottom pad.

This design is more complex than the previous paperweight project that was created with a card of sewing fasteners.  All you need are a few more elements and a little patience to come up with a layout you love.

I hope you enjoyed today's sewing paperweights.  Which one do you like the most?

Craft Paperweights With Vintage Sewing Notions


I recently purchased a box of antique and vintage sewing notions I thought I'd put to excellent use to show you how easy it is to turn something simple into a unique accessory for your desk.  For you Etsy store owners, these are also perfect for resale.


For this project I chose a vintage card with three rows of metal hooks held in place by stitches of black thread.  The printed graphics, imperfect stitches, and the dimensional hooks look incredible under glass.  Instead of using a card of hooks or fasteners, you can also complete this project with a card of buttons.  Just make sure whatever you use isn't too thick to fit into the recessed cavity on the bottom of the paperweight.


Because the card wasn't large enough to cover the paperweight's mounting board, I applied a scrap of green background paper that matched the graphics.  The paper was placed on the self-adhesive side of the mounting board and the excess material was trimmed.


The card was glued to the mounting board (covered with green paper) using Aleene's Tacky Glue.


Once the glue dried completely, any portions of the card that went beyond the edge of the mounting board were trimmed.

For this project I used the Heirloom Rectangle paperweight kit.  The mounting board (with applied card) was placed face-down into the recessed area on the bottom of the paperweight.  I finished by applying the velvet bottom pad.

I'll be posting another paperweight project today that's a little more complex.  Which one is your favorite?

7/13/2011

Turn Drab Notepads Into Designer Desk Gear

Last week I discovered a new magazine called Fresh Style.  It's quickly become one of my favorite crafting magazines because it's filled so many projects - many of which I can't wait to try.

Fresh Style includes five sections:
  1. Handmade Projects - Reinvent ordinary items and thrift sotre finds with our quick and clever DIY projects.
  2. Inspiring Spaces - Find your creative muse in one of these fab interiors, from a budget-savvy city apartment to a laid-back beach house.
  3. Creative Ways - Bring a fresh look to areas in and around your home with resourceful ideas using everyday things.
  4. Life & Style - Take a look at the innovative worlds and inspiring spaces of our favorite artists and designers.
  5. Weekend Updates - Combine ingenuity and chic style in a whole-room revamp you can achieve in a weekend.

I wanted to share one of my favorite project ideas with you from the Summer 2011 issue.

Photo Credit: Fresh Style, Summer 2011

If you're anything like me, you have at least one basic notepad on your desk that you can quickly grab to jot down an appointment, address, or phone number.  The top of mine are covered with advertising for the office supply store I purchased them from.  How ugly is that?

Now you can ditch the drab notepads and be the center of office envy.

To give your 'Plain Jane' notepads a designer touch, simply cut a strip of decorative paper or card stock to fit the top of the notepad and glue it into place.  Finding beautiful, patterned paper is easy.  Craft stores such as Michael's typically carry more than 100 different designs by the sheet near their scrapbooking supplies.

I hope you love this project as much as I do.  I can't wait to bring you something new tomorrow.
Posted on Wednesday, July 13, 2011 | Categories: