2/27/2015

Displaying an Embossed Metal Finding in a Glass Paperweight


I really enjoy working with embossed metal, especially vintage findings I pick up on Etsy or in flea market junk bins.  These days you can also create your own embossed, metal artwork using a variety of tools and machines from companies such as Sissix.


Vintage findings are typically made from thicker, sturdier metal.  These pieces have a lot of shape and dimension.  That's fine when you're creating art for a dome paperweight, or other paperweight styles that have a deeper recess (more ceiling height to the interior space).  For a paperweight like the Oval (PhotoWeights: Oval Paperweight Kit), there's not much room to work with when it comes to depth.  This is where a little creativity (and a hammer) come into play.


For this project you'll need a paperweight kit, a metal finding, and some decorative paper, fabric, or other material to use as your background.  You can also add some other embellishments if you'd like.


For the background I used K&Company's Jubilee Bright Flowers scrapbook paper.  Using a template (PhotoWeights: Display Area Template), I selected an area of the paper and traced around it with pencil.


After I cut the paper along the trace line, I adhered it to the adhesive side of the mounting board (included with the paperweight kit).


If your metal finding has any fastener tabs, remove them with a pair of needle nose pliers by bending them back and forth a few times.  Use an emery board to smooth out any rough spots of metal this may leave behind.


If you're working with a finding that has a lot of depth and dimension to it, flattening it may make it look like it's been run over by a car.  (The smashed face of a cherub may not be the look you're after.)  Pick a finding that is already fairly flat.

To flatten the metal finding, place it between two pieces of cardboard before using a flat-head hammer to strike over the entire area.  Use a gentle amount of force.  Continuously check the progress of your work to make sure you evenly flattening all areas of the finding.


Once the finding has been flattened enough to fit within the paperweight, clean it with glass cleaner to remove any dirt, dust, or debris before applying tacky glue to the back.  Be sure to keep the glue a safe distance from the edges to prevent it from seeping out when the piece is applied to the mounting board.

Tacky glue is perfect for this application because it will stay in place and won't run.   (I used Aleene's Original Tacky Glue).  I don't recommend hot melt glue when the thickness of your artwork is very limited.


Gently position the metal finding onto the background.  Any glue that becomes visible may be removed with a lightly moistened Q-tip.


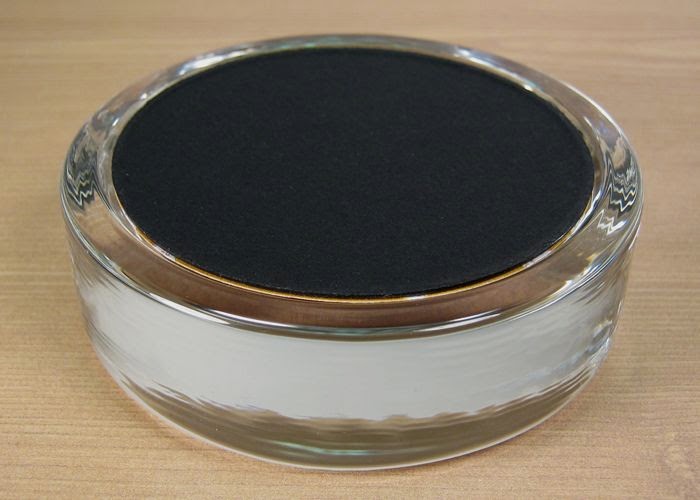
After the glue has dried completely, follow the finishing instructions that come with each PhotoWeights paperweight kit.  This involves placing the artwork face-down into the recessed area of the paperweight and covering the underside of the paperweight with the adhesive bottom pad that comes with each kit.

2/25/2015

Miniature Sushi Captured Within a Dome Paperweight - Wasabi and Chop Sticks Included!


During one of my recent shopping sprees on Etsy, I came across a shop called Teeny Imperfections.  It's owned by Lisa Schrecengost, a miniature food artist.  She offers all sorts of handmade creations that include brownies, nachos, fried chicken, fruit, and cupcakes.

The miniature that really grabbed my attention was sushi on a wooden plank - complete with wasabi, ginger, and a pair of chopsticks.  I immediately thought, "That would make an incredible paperweight!"  I have to admit I also got a little hungry.  Don't they look real?  You can almost taste the wasabi.

All of Lisa's work is personally made by her to order.  She also takes special orders, and can create just about any food you'd like.

For the sample paperweight I used the Heirloom Dome (PhotoWeights: Heirloom Dome).  The background the miniature was adhered to is textured, green paper.

If you order a miniature for one of your paperweight projects, be sure to let Lisa know how small to make it.

Teeny Imperfections on Etsy:
http://www.etsy.com/shop/teenyimperfections 

2/23/2015

A Pretty, Embossed Postcard from 1909 Looks Splendid in a Scalloped, Glass Paperweight


Antique postcards are among the easiest, most affordable things you can use to create beautiful, high-end paperweights that look like they came straight from the pages of Victoria or Country Living.

These century-old pieces of artwork often feature rich colors, embossed designs, and metallic detailing that truly look splendid under glass.

The postcard I used for this project was just $2.00.  When you add this to the price of the paperweight kit ($10.75), this finished paperweight cost only $12.75 to make.


For this project you'll need an antique postcard and a glass paperweight kit (PhotoWeights: Scalloped Paperweight Kit).   An optional template was also used.


It isn't necessary to use a template for this project.  However, you may find a template makes it much easier to mark the area you'd like to display in your paperweight.  Our templates are reusable and may be purchased on our website (PhotoWeights: Display Area Templates).

Place the template opening over the desired location and lightly trace around the artwork with a pencil.  Cut out your artwork with a pair of good scissors by following the line you traced.


The photo above shows the area of the postcard I marked and cut out.  You can see the embossed flowers and metallic gold circling the Best Wishes seal.  There's also a metallic gold swag in the background.


Remove the protective film from the self-adhesive bottom pad.


Place your artwork onto the adhesive side of the mounting board and press down to adhere.


Take a minute to clean your paperweight with streak-free glass cleaner to remove any dirt, finger prints, or smudges.  Also be sure the bottom surface is free of dust.

Place the mounting board (artwork facing down) into the recessed area on the underside of the paperweight.


Remove the protective film to expose the adhesive on the bottom pad.


Place the bottom pad on the underside of the paperweight.


The finished paperweight will add some color and charm to the lucky owner's desk.

1/28/2015

Washi Tape: Add a Finishing Touch to Your Paperweights


Washi tape has been emerging in popularity over the past few years.  When I attended the CHA (Craft & Hobby Association) Show in Anaheim, CA, in 2014, only a few brands seemed to carry it.  This year it was everywhere!

In addition to Scotch® and Duck®, companies best known for their tape, many smaller companies in the creative industry have also introduced their own washi tape designs to coordinate with their collections. Two of my favorites include Tim Holtz and Graphic 45.  Little B, Bo Bunny, We R, and American Crafts have also thrown their hats into the washi tape ring.


If you have no idea what washi tape is, you're not alone.  It actually hasn't been around for very long.  I would describe it as being similar to paper tape used in first-aid.  It's smooth, thin, flexible, and very strong.  It's available in a wide variety of colors, patterns, and widths.


Wrapping Your Paperweights
with Washi Tape


Washi tape can only be used to wrap the outside of a few of our paperweight styles; the Round, Large Round, and Heirloom Square.  Our other paperweights have tapered sides that gradually widen from the top surface to the base, preventing the tape from laying flat.

I recommend applying some clear glue where the ends of the tape meet to prevent the tape from lifting.   Washi tape isn't permanent, so it's not practical for paperweights that will be picked up and handled on a regular basis.

12/29/2014

Personalizing Paperweights With Names, Monograms, and Text


Many of our customers have asked for a little guidance when it comes to personalizing paperweights with a name, monogram, or other text.  These basic, step-by-step instructions are an excellent starting point.  They can be also be modified in several different ways.


In most cases, the first step in designing a paperweight with text is to create a layout using a desktop publishing program.  If you don't have publishing software, a word processor or image editor with text capabilities can also be used.

Our website includes the display area measurement for each of our paperweight kits.  Using a shape or drawing tool with your ruler visible, draw a shape (circle, oval, rectangle, etc.) that is the same size as the paperweight's display area.  For this project I'm using the Elegant Oval Paperweight Kit (PhotoWeights: Elegant Oval)  which includes a smaller display area in the center.  I've drawn two oval shapes.  The outside oval is the size of the mounting board.  The inside oval marks the actual display area.

I'm going to print my name onto decorative paper, so the name is all I'll print.  If you wish, you can place a background image or solid color behind your text so it prints as ready-to-use artwork.

I deleted both outlines prior to printing the name because I'm going to position a template over my artwork to create a cut line.


I printed a test copy so I could check to make sure the name fits well within the paperweight.


Because I'm printing the name onto uncoated, textured scrapbooking paper, I need to print this using my ink jet printer.  Toner doesn't adhere well to textured paper.  Many decorative papers have coatings that can damage laser printers.  If you're using a laser printer, use only laser-safe paper.

I taped a piece of scrapbook paper to a sheet of letter sized paper because my printer has a difficult time recognizing odd sized pages.  I recommend leaving 1-2" of space at the top of the page to allow room for the tape.  This will also help the page feed properly into your printer.

Be certain there are no adhesive areas of tape exposed, including pieces that may have gone beyond an edge of the paper.  You don't want any tape to catch inside your printer.

All printers are different.  Consult your user's guide.


The name was printed using an "automatic" paper setting on the highest quality setting possible.

I used a template (PhotoWeights: Display Area Templates) to draw a pencil line that will act as my cutting guide.


The name was cut out with a pair of scissors.  If any traces of the pencil line will appear in your paperweight, gently remove them with an eraser.


Place the printed paper onto the adhesive side of your mounting board and press all over to ensure an even bond.


Place the board face-down into the recessed area on the bottom of your paperweight.  Be sure to clean the paperweight with glass cleaner prior to completing this step.  Also be sure the bottom surface of the glass if free of smudges and dust particles.


Finish by applying the self-adhesive bottom pad to the underside of the paperweight.


This step-by-step guide can also be used to create monogram paperweights and paperweights with poetry, quotes, and other text.

If you have any questions, or if you need help with your particular paperweight project, please feel free to contact me directly at susan@photoweights.com.

9/11/2014

A Vignette of Antique Sewing Notions Displayed in a Glass Paperweight


My blog post from yesterday (Glass Paperweight Finished with a Vintage Thread Card) walked you through the steps involved in placing a single object in a paperweight using a decorative paper background.  Today's project will show you how to display a few different items in your paperweight.  There are more steps involved.  However, I'm sure you'll find each step is just as easy, depending on the complexity of your design layout.


For this project I used the Large Rectangle Paperweight Kit (available on our website at PhotoWeights.com).  This paperweight style features the largest display area we offer (4 1/2" x 2 3/4").  My display items include a page of scrapbook paper (to use as the background), a paper card of sewing snaps, and a thread card.


Because I want the background to blend in, I chose a piece of scrapbook paper that coordinates with the display items I'm using.  The paper has an aged look that I love.

The self-adhesive mounting board (included with each paperweight kit) is adhered to the reverse side of the paper.  Using a pair of scissors, trim any paper that extends beyond the edge of the board.


I applied glue to the back of the paper sewing card, making sure to keep the glue away from the edges.  You can use white glue for this step, or any liquid glue that's suitable for paper.   (I used Aleene's Original Tacky Glue.)

If you're using items that have sentimental value, such as notions from your grandmother's sewing box, consider using removable, double-sided mounting tape or non-permanent glue.  If you glue something in place permanently, it may be ruined if you decide to remove it from the paperweight at a later time.


The card (with glue on the back) was centered onto the mounting board and carefully pressed into place.  Notice I kept the handwritten, 10-cent price on the card.  I thought this added some character to the piece.


Glue was also applied to the back of the paper thread card.  Again, I kept the glue away from the edges.  I also made sure the tail end of the thread was covered with glue so it would stay in place.


The thread card (with glue on the back) was placed directly onto the card of sewing snaps.


After the thread card was in place, I thought the design needed a little something extra.  I found an old, metal tool in my box of sewing items that I thought would be perfect.  This was glued to the top of the thread card and positioned at an angle.

Once all the elements of your design are finished, allow the glue to dry completely to keep everything in place.  Some types of glue release chemicals during the drying process.  If your glue isn't completely dry before you assemble your paperweight, you may end up with a cloudy film inside the glass. 


After the glue has dried completely, place your design face down into the recessed area on the bottom of the paperweight.


Apply the self-adhesive bottom pad (also included with each paperweight kit) over the base of the paperweight.


You're finished!
Posted on Thursday, September 11, 2014 | Categories:

9/10/2014

Glass Paperweight Finished with a Vintage Thread Card


Last month I purchased a small assortment of vintage thread cards at an antique shop that recently opened a few towns away.  I thought I'd use one in a project to show you just how easy it is to design and create paperweights that display a single object.

These instructions may be followed if your working with other types of objects.  Just be sure the items aren't too thick to fit into the bottom recess measurement of your paperweight kit.


I used the Round Paperweight Kit for this project (available at PhotoWeights.com) because I thought it was just the right shape for displaying a round thread card.  For the background, I chose decorative grid paper because it reminded me of the old cutting board my mom used for her sewing patterns.


After I placed the self-adhesive mounting board (included with each paperweight kit) onto the back of the grid paper, I used a pair of scissors to trim any paper that extended beyond the edge of the board.


The thread card was glued directly to the mounting board, making sure the tail end of the thread was tucked underneath and held in place by the glue.

If you're working with an item that has some value, including sentimental value, you may want to take better care when it comes to affixing it to the mounting board.  If you don't want an item to be ruined if you ever decide to remove it from the paperweight, consider the use of non-permanent glue or mounting tape.  Some items may also be held to the card with wire that passes through holes punched through the mounting board.


To add a little extra touch to the design, I placed a needle through the thread.


After the glue has dried completely, place your design face down into the recessed area on the bottom of the paperweight.

Some types of glue release chemicals during the drying process.  If your glue isn't completely dry before you assemble your paperweight, you may end up with a cloudy film inside the glass.


Apply the self-adhesive bottom pad (also included with each paperweight kit) over the base of the paperweight.


You're finished!