Showing posts with label Finding Treasures to Display in Your Paperweights. Show all posts

9/10/2014

Glass Paperweight Finished with a Vintage Thread Card


Last month I purchased a small assortment of vintage thread cards at an antique shop that recently opened a few towns away.  I thought I'd use one in a project to show you just how easy it is to design and create paperweights that display a single object.

These instructions may be followed if your working with other types of objects.  Just be sure the items aren't too thick to fit into the bottom recess measurement of your paperweight kit.


I used the Round Paperweight Kit for this project (available at PhotoWeights.com) because I thought it was just the right shape for displaying a round thread card.  For the background, I chose decorative grid paper because it reminded me of the old cutting board my mom used for her sewing patterns.


After I placed the self-adhesive mounting board (included with each paperweight kit) onto the back of the grid paper, I used a pair of scissors to trim any paper that extended beyond the edge of the board.


The thread card was glued directly to the mounting board, making sure the tail end of the thread was tucked underneath and held in place by the glue.

If you're working with an item that has some value, including sentimental value, you may want to take better care when it comes to affixing it to the mounting board.  If you don't want an item to be ruined if you ever decide to remove it from the paperweight, consider the use of non-permanent glue or mounting tape.  Some items may also be held to the card with wire that passes through holes punched through the mounting board.


To add a little extra touch to the design, I placed a needle through the thread.

After the glue has dried completely, place your design face down into the recessed area on the bottom of the paperweight.

Some types of glue release chemicals during the drying process.  If your glue isn't completely dry before you assemble your paperweight, you may end up with a cloudy film inside the glass.


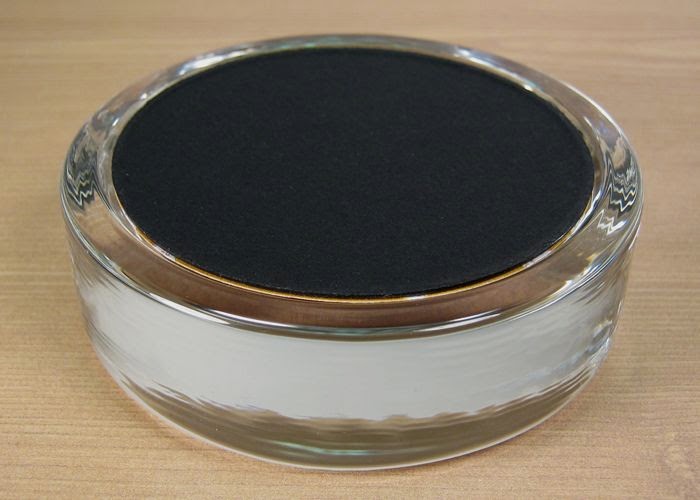
Apply the self-adhesive bottom pad (also included with each paperweight kit) over the base of the paperweight.


You're finished!

9/16/2013

Turning Old, Brass Hardware into Pretty Paperweights


If you look closely for the small things we tend to overlook when searching for design elements, you can discover a treasure trove of findings you can use to create some very beautiful and unique paperweights.

This paperweight was created with a brass key hole cover I found while sifting through a $1.00 box at an antique flea market.  The only other items required for the design include a couple pieces of scrapbook paper.


Pictured above are the elements needed to create this paperweight.  They include a paperweight kit (PhotoWeights: Round), key hole cover, a small piece of black, textured paper, and a swatch of scrapbook paper.  I used paper from a paper pad (MME #P0R6X6, Cowboy) that resembles an old, French newspaper.


The first step is to cover the self-adhesive mounting board (included with each paperweight kit) with the paper being used as the background.  Trim any paper that extends beyond the edge of the board.


Center the key hole cover onto the mounting board, or place it in the desired location.  Using a pen or pencil, outline the key hole opening and mark the location of any nail holes.


Nail holes are relatively small, so the area behind them can be blacked out with pen.  For the key hole opening, I glued a small piece of textured, black paper over the area that will be visible.


Because the back of they key hole cover is not smooth, and doesn't have any flat surfaces, I used hot melt glue to apply it to the background.  Keep the glue away from the key and nail openings.  Also be careful not to burn yourself.  When you're using hot glue on metal, the entire piece will heat up.


After you've cleaned your paperweight with streak-free glass cleaner, and removed any dust or particles from the paperweight and your artwork, place the mounting board face-down into the recessed area on the bottom of the paperweight.


To finish, place the plush, self-adhesive bottom pad over the base of the paperweight.


I hope this project will inspire you to see the design possibilities in objects you may not have looked for in the past. 


7/11/2013

Collection of Low Profile Skeleton Keys from K&Company


One of the many memories I have of my grandmother's house, a small bungalow just outside Los Angeles, is a collection of decades-old keys that hung in a kitchen cabinet, seemingly forgotten.  Perhaps the only thing they opened was a memory or two - a first car, her childhood home, maybe a key she brought with her from Germany when she was a child.  What I would give for those keys now!

Skeleton keys are among my favorite items to use in my paperweight designs.  Unfortunately, many keys have a profile too deep to fit the interior of several PhotoWeights paperweight styles.  This is why I wanted to share a recent find that offers the look of timeworn keys while providing a low profile and a flat surface that make them easy to adhere to fabric and paper.  The set is called Life's Journey Keys Metal Art (565227) by K&Company.  (UPC 643077565227).


The "Life's Journey" collection includes ten different keys that range from 1.5" to 3.5" long with a thickness of 1/16" - 1/8", depending on the style.  The finishes include aged brass, copper, and steel.  The photo above shows the depth of one of the keys in the collection.


These keys are perfect when displayed alone on scrapbook paper.  You can also use them to create mixed media vignettes for your paperweights.

If you need some inspiration for your paperweight designs, visit a local craft store to see all the different metal art and embellishments available these days.  Bring a paperweight with you to help you envision how items will appear and fit within the display area.


1/16/2012

Finding Inspiration in the Bottom of a Junk Box


On the third Sunday of each month, you can usually find me pulling my vintage shopping cart through the aisles of the Long Beach Antique Market in Long Beach, California.  This time I was on the lookout for old Valentine's Day cards.  I also came across a few bags filled with other goodies that I'm sure will take me a couple hours to sort through.

If you create paperweights to sell in your shop or sell on Etsy, and occasionally have a difficult time dreaming up new designs, it's easy to find inspiration in boxes filled with miscellaneous trinkets and baubles.  Some dealers even specialize in selling odds-and-ends and have them categorized into groups such as scrabble letters, pinbacks, poker chips, tie clips, wooden bingo card markers, watch faces, etc.

You'll be surprised how many design ideas you can get just by looking through a box of junk.

This week I'll post several paperweight designs I create using items I found in Long Beach last weekend.

1/04/2012

Wallpaper Paperweights Made With Scraps and Samples


I'm often asked about the types of items that can be used to create easy paperweights as gifts that look as though they came out of an elegant boutique.  Wallpaper is among my favorite things to recommend.

Wallpaper is available in an endless variety of designs, textures, and colors.  In addition to current patterns and reproductions, it's also possible to find samples from each decade dating back more than a century.  Turning these vintage scraps into paperweights is a wonderful way to save and display these printed treasures.
If you're shopping for patterns in the store, and don't want to purchase a full roll, ask the clerk if it would be possible to order a sample.  If you have your heart set on something truly vintage, I'd recommend Ebay.  While vintage paper may turn up at tag sales from time-to-time, Ebay will likely have hundreds of listings for you to choose from.

11/11/2011

Transform Last Year's Cards Into This Season's Holiday Cheer


Here's a little tip for those cards you've collected from years past.   Turn them into cute, whimsical paperweights to spread a little holiday cheer.  They make great gifts for friends and co-workers.

6/22/2011

Literary Paperweights - Turn an Antique Book Cover Into a Glass Paperweight


I love old books, especially those featuring gold embossing and other intricate designs on the cover.  I must have accumulated dozens of antique books over the years that I purchased simply because the artwork was too beautiful to pass up.

One of my passions in life is collecting antiques.  Therefore, I hate the thought of old books being sacraficed for craft projects unless they're in poor condition.  This said, there are many sources for antique books you may purchase for their cover artwork (or the artwork and illustrations inside).  These include tag sales, thrift stores, and library book sales.  Some antique stores may also carry a selection of discounted books.


The book I used for this project was purchased for 25-cents at a recent rummage sale.  It was in very bad condition and a few strings away from losing its cover.  Fortunately, the gold embossed artwork looked wonderful.  After a quick buff with a slightly damp rag, the color became more vivid and the gold's lustre was restored.


Because the cover of the book is fairly thick, I didn't need to adhere the paperweight kit's mounting board to the reverse side.  Instead, I used the mounting board as a guide to trace my cut line.  Once the artwork was cut (see above) it took less than a minute to place the artwork in the paperweight (PhotoWeights: Round Paperweight Kit) and apply the velvet bottom pad to finish.

Please leave a comment to let us know what you thought about this project.  We'd also love to hear about your project ideas.


5/04/2011

Creating a Sandy Background for Your Paperweights


I wanted to share an easy tip for creating the perfect sandy background for your paperweights.  This background is wonderful for shells and other small trinkets from the shorline.

Can you guess what I used?  Creating this look is as simple as applying sandpaper to the mounting board included in each paperweight kit.

Do you have any tips for background materials?  Please share your ideas by posting them below.


3/31/2011

Clipped from a Magazine - Chanel No. 5 Paperweight

Finding photographs and artwork for your paperweights can be as simple as opening up your favorite magazine.  Most are filled with gorgeous images of places near and far.

Last night I came across a stunning, high-gloss ad for Chanel No. 5 and thought it would make the perfect paperweight for my good friend who has adored this perfume for years.  It looks spectacular!  (PhotoWeights: Round Paperweight Kit)

When using magazine images for your paperweights you should only use the original magazine page.  The vast majority of magazine images are protected and should not be reproduced.

3/29/2011

Something Old is Something New

With April just days away, I thought it was the perfect time for me to flip through my antique postcard collection in search of Easter themed cards.  I found a few, including the cutest card (postmarked 1916) with artwork that features two little chicks and Easter basket filled with eggs and flowers.  The design is embossed, giving it a little depth and texture, making this paperweight even more special.

If you've followed my projects over the years, you know how much I absolutely love creating paperweights with antique postcards.  They're so easy and affordable!  Most antique shops will carry hundreds of designs ranging from $1.00 to $3.00.  If you need help choosing the right one, bring your paperweight with you so you can see exactly how the artwork will look.