Showing posts with label Paperweight Style: Round. Show all posts

3/23/2015

Create a Bold, Statement Paperweight Using a Broken Pendant


Once in a while, something in my stash of craft supplies ends up being crushed or broken.  This was the case with this 'art-i-cake' crown and wings pendant.  The piece split in two which resulted in the loss of one of the rhinestones.

I didn't have the heart to throw the pendant away, so I decided to repurpose it as a piece of desktop bling.


This is one of those simple projects that only requires some background material (paper, fabric, etc.), as well as the dimensional item that will be the focal point of your design.

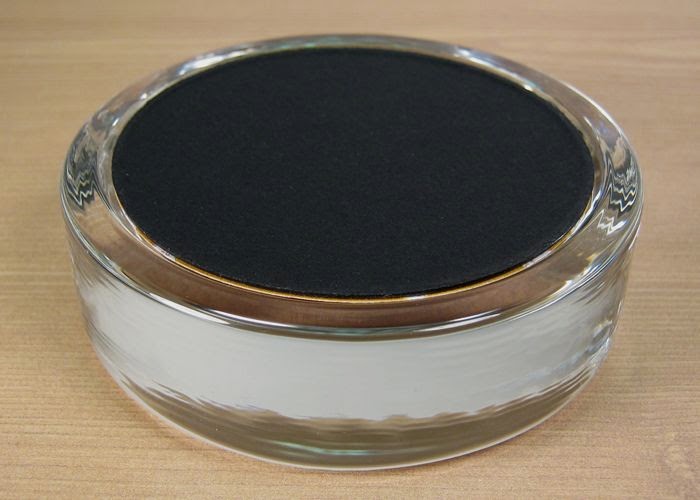
As is the case with all dimensional items, make sure it fits within the recessed area of your paperweight.  The recessed area is the ceiling height of the interior display space.

I used the Round Paperweight Kit (PhotoWeights: Round Paperweight Kit) which includes a self-adhesive mounting board and bottom pad, as shown above.


One of my favorite supplies to keep on hand are small books/stacks of cardstock scrapbooking paper.  These typically include a variety of colors and patterns, giving you a virtual library of backgrounds to choose from.


Place the adhesive side of your mounting board onto the reverse side of the paper (or other material) you'll be using as your background.


Using a pair of scissors, cut any material that extends beyond the edge of the mounting board.  The mounting board will act as an excellent cutting guide.


If you're working with a pendant that has a loop or a bail, remove it with a pair of jewelry nippers.  Use an emery board or fine sand paper to smooth the edges.


In the following steps I'll essentially reconstruct the broken pendant by gluing the pieces to the mounting board.


Lay the pieces of the pendant in the center of your mounting board and mark the edges of the pendant by placing removable tape on the board.  The tape will act as a guide when you're ready to glue the pieces into place.


I prefer to use hot melt glue for pendants that have impressed areas on the back surface.  Liquid glue will run, especially when it pools into impressions.  Hot melt glue will fill in gaps between the pendant and the mounting board.


After the pieces of the pendant were glued to the background, the rhinestone that had previously popped out was re-set with clear glue.


After the liquid glue holding he stone dried completely, the mounting board was placed face-down into the recessed area on the bottom of the paperweight.


To finish, I covered the bottom surface of the paperweight with the self-adhesive bottom pad.

1/28/2015

Washi Tape: Add a Finishing Touch to Your Paperweights


Washi tape has been emerging in popularity over the past few years.  When I attended the CHA (Craft & Hobby Association) Show in Anaheim, CA, in 2014, only a few brands seemed to carry it.  This year it was everywhere!

In addition to Scotch® and Duck®, companies best known for their tape, many smaller companies in the creative industry have also introduced their own washi tape designs to coordinate with their collections. Two of my favorites include Tim Holtz and Graphic 45.  Little B, Bo Bunny, We R, and American Crafts have also thrown their hats into the washi tape ring.


If you have no idea what washi tape is, you're not alone.  It actually hasn't been around for very long.  I would describe it as being similar to paper tape used in first-aid.  It's smooth, thin, flexible, and very strong.  It's available in a wide variety of colors, patterns, and widths.


Wrapping Your Paperweights
with Washi Tape


Washi tape can only be used to wrap the outside of a few of our paperweight styles; the Round, Large Round, and Heirloom Square.  Our other paperweights have tapered sides that gradually widen from the top surface to the base, preventing the tape from laying flat.

I recommend applying some clear glue where the ends of the tape meet to prevent the tape from lifting.   Washi tape isn't permanent, so it's not practical for paperweights that will be picked up and handled on a regular basis.

9/10/2014

Glass Paperweight Finished with a Vintage Thread Card


Last month I purchased a small assortment of vintage thread cards at an antique shop that recently opened a few towns away.  I thought I'd use one in a project to show you just how easy it is to design and create paperweights that display a single object.

These instructions may be followed if your working with other types of objects.  Just be sure the items aren't too thick to fit into the bottom recess measurement of your paperweight kit.


I used the Round Paperweight Kit for this project (available at PhotoWeights.com) because I thought it was just the right shape for displaying a round thread card.  For the background, I chose decorative grid paper because it reminded me of the old cutting board my mom used for her sewing patterns.


After I placed the self-adhesive mounting board (included with each paperweight kit) onto the back of the grid paper, I used a pair of scissors to trim any paper that extended beyond the edge of the board.


The thread card was glued directly to the mounting board, making sure the tail end of the thread was tucked underneath and held in place by the glue.

If you're working with an item that has some value, including sentimental value, you may want to take better care when it comes to affixing it to the mounting board.  If you don't want an item to be ruined if you ever decide to remove it from the paperweight, consider the use of non-permanent glue or mounting tape.  Some items may also be held to the card with wire that passes through holes punched through the mounting board.


To add a little extra touch to the design, I placed a needle through the thread.


After the glue has dried completely, place your design face down into the recessed area on the bottom of the paperweight.

Some types of glue release chemicals during the drying process.  If your glue isn't completely dry before you assemble your paperweight, you may end up with a cloudy film inside the glass.


Apply the self-adhesive bottom pad (also included with each paperweight kit) over the base of the paperweight.


You're finished!

9/16/2013

Turning Old, Brass Hardware into Pretty Paperweights


If you look closely for the small things we tend to overlook when searching for design elements, you can discover a treasure trove of findings you can use to create some very beautiful and unique paperweights.

This paperweight was created with a brass key hole cover I found while sifting through a $1.00 box at an antique flea market.  The only other items required for the design include a couple pieces of scrapbook paper.


Pictured above are the elements needed to create this paperweight.  They include a paperweight kit (PhotoWeights: Round), key hole cover, a small piece of black, textured paper, and a swatch of scrapbook paper.  I used paper from a paper pad (MME #P0R6X6, Cowboy) that resembles an old, French newspaper.


The first step is to cover the self-adhesive mounting board (included with each paperweight kit) with the paper being used as the background.  Trim any paper that extends beyond the edge of the board.


Center the key hole cover onto the mounting board, or place it in the desired location.  Using a pen or pencil, outline the key hole opening and mark the location of any nail holes.


Nail holes are relatively small, so the area behind them can be blacked out with pen.  For the key hole opening, I glued a small piece of textured, black paper over the area that will be visible.


Because the back of they key hole cover is not smooth, and doesn't have any flat surfaces, I used hot melt glue to apply it to the background.  Keep the glue away from the key and nail openings.  Also be careful not to burn yourself.  When you're using hot glue on metal, the entire piece will heat up.


After you've cleaned your paperweight with streak-free glass cleaner, and removed any dust or particles from the paperweight and your artwork, place the mounting board face-down into the recessed area on the bottom of the paperweight.


To finish, place the plush, self-adhesive bottom pad over the base of the paperweight.


I hope this project will inspire you to see the design possibilities in objects you may not have looked for in the past. 


3/21/2012

Snow Globe Paperweight... Shake it Up!


During a recent visit to a local craft store, I discovered a very pretty set of snow globe stickers from K&Company (SW Botanical Snob Globe Stickers).  As soon as I saw them, I knew they'd be perfect for creating instant snow globe paperweights.


The set of stickers (shown above) includes 13 pieces that feature the watercolor paintings of Susan Winget. The pieces include a large snow globe sticker (2 1/4"), four smaller snow globe stickers (1 7/8"), and eight small, coordinating stickers.


For this project I used the 2 1/4" snow globe sticker.  Because it was slightly smaller than the paperweight kit's mounting board, I covered the mounting board with coordinating paper. (The Paper Company, Metallic Cover 12 x 12, Blue Bell).


The snow globe sticker was applied directly to the colored paper on the mounting board.  Here's a tip.  If your snow glob sticker has an unsmooth edge.  Use a pair of scissors to carefully trim any jagged areas.  Just be sure not to open the seam.

Here's how the paperweight is assembled:


Figure 2:  Place your artwork image-side down into the recessed area on the bottom of the paperweight.

Figure 3:  Cover the base of the paperweight with the pre-cut, self-adhesive bottom pad.  This piece is also included with each paperweight kit.


I love this paperweight because it has a lot of beauty and sparkle.  When it's on my desk, it's hard to resist picking it up and shaking it throughout the day. 


1/25/2012

Wedgwood Cabochon Paperweight

Sorting through mountains of costume jewelry is like therapy for me.  If you have the time and patience for it, I'd highly recommend it.  Just mind the brooches.  Getting poked by sharp pin is no fun at all.

The Wedgwood cabochon I used for this project came from the heap of costume jewelry pictured below.  It's a nice piece that set me back $2.00, a bargain for any fan of Wedgwood Jasperware.

Most cabochons sold by jewelry suppliers and craft store are made of resin.  This is why I prefer to go vintage.  Not only is the quality much higher, there are also so many gorgeous designs out there to choose from.  You can also choose to leave a cabochon in it's metal frame, or gently pry it out.  Just keep in mind that everything has to fit inside the recessed area on the bottom of your paperweight.

For this project I used a Round paperweight kit.  I also cut a small piece of paper from my "Old World Stack" book by DCWV.  I chose a cream colored baroque pattern that didn't distract from the Wedgwood blue.

After applying the paper to the round mounting board that was included in the paperweight kit, I trimmed the paper to fit.  The piece of Wedgwood was mounted directly to the background with tacky glue.

Once the glue dried completely, the paperweight was finished by placing the mounting board, Wedgwood side down, into the recessed area on the bottom of the paperweight.  A piece of self-adhesive velvet, also included in the paperweight kit, was applied over the base of the paperweight to finish.


10/06/2011

Turn a Papyrus Halloween Card Into Three Adorable Paperweights


When I saw this Papyrus card in the store, I immediately pictured individual paperweights with a background for each character.  I love the results.  I hope you do, too.

The card (Papyrus - Halloween Icons, available at some Target stores) features a black cat, puppy, and an owl.  Each piece is made of felt with added embellishments - including a red, rhinestone collar for the cat.  At a cost of $6.95 for the card, you're paying a little more than $2.30 for each character which is truly a bargain.

Here's how I created these three paperweights:


The first step is to remove the felt characters from the card.  Do this as gently as possible to prevent them from being damaged.  Be especially careful with the owl's two delicate, die-cut feet.

Let's start with the black cat...


When I think of black cats at Halloween, I picture them sitting on a front porch surrounded by pumpkins and jack-o'-lanterns.  I thought this would be the perfect background.  Here's the easy peasy part.  I simply looked through a couple magazines and found the perfect photo.  Doesn't she look right at home?


I used the Heirloom Rectangle Paperweight Kit for this project.  The magazine photo was set on the adhesive side of the mounting board (shown above) and any paper that extended beyond the board was trimmed.  The cat was glued to the background with white glue.

Now for the owl...


For the fuzzy, little owl I used the greeting card's envelope to create an orange background.  Because I placed him in a dome paperweight (Dome Paperweight Kit - 1/2" Recess), I wanted to keep the background clean and simple.  Again, I used white glue to apply the owl to the background.

Last but not least, the puppy...


The background I used for the puppy is actually a Jimmy Dean magazine ad.  There was just enough space for him to fit right between the van and the text.


The background includes a photograph of real grass next to a paved area that's somewhat cartoonish.  It reminds me of the new children's shows that combine realiastic backgrounds with animated characters.  A little white glue will set him in place. By the way, I used the Round Paperweight Kit for the puppy. 

I hope these three designs will inspire you to create a Halloween paperweight of your own for your workspace, party, or as a gift.

Next week I'll post some fun, ghoulish paperweight designs that will grab anyone's attention.

6/22/2011

Literary Paperweights - Turn an Antique Book Cover Into a Glass Paperweight


I love old books, especially those featuring gold embossing and other intricate designs on the cover.  I must have accumulated dozens of antique books over the years that I purchased simply because the artwork was too beautiful to pass up.

One of my passions in life is collecting antiques.  Therefore, I hate the thought of old books being sacraficed for craft projects unless they're in poor condition.  This said, there are many sources for antique books you may purchase for their cover artwork (or the artwork and illustrations inside).  These include tag sales, thrift stores, and library book sales.  Some antique stores may also carry a selection of discounted books.


The book I used for this project was purchased for 25-cents at a recent rummage sale.  It was in very bad condition and a few strings away from losing its cover.  Fortunately, the gold embossed artwork looked wonderful.  After a quick buff with a slightly damp rag, the color became more vivid and the gold's lustre was restored.


Because the cover of the book is fairly thick, I didn't need to adhere the paperweight kit's mounting board to the reverse side.  Instead, I used the mounting board as a guide to trace my cut line.  Once the artwork was cut (see above) it took less than a minute to place the artwork in the paperweight (PhotoWeights: Round Paperweight Kit) and apply the velvet bottom pad to finish.

Please leave a comment to let us know what you thought about this project.  We'd also love to hear about your project ideas.